Wednesday, February 20, 2013

Paint, Sweet Potatoes, and Makeovers

I hope this post finds you all well! Things are going pretty good around here. Busy. Trying to soak in all the moments of having little ones. Here are a few things we've been doing this week.....


Painting has become an every day affair lately....its kind of a love/hate relationship! Love that they are being creative and hands on, hate the mess it makes!


I think Ryder gets more on his shirt than he does the paper ;)


There's always cooking happening and always a million recipes I want to share with you all! I will spare you the millions and just give you one....for today. 

We have been enjoying sweet potato fries a lot in the last few weeks but I had been buying the frozen bags of them (which are excellent) but I knew I could make them myself. Here's what I came up with! 


Peel...


One potato per person was perfect!

Go ahead and give that ol' knife a good sharpen! These suckers are hard to cut! And then watch your fingers!


Cut into 1/2 slices, then again into strips...try to keep them all the same size so they will cook evenly.


Sprinkle a little bit of flour on them...not necessary, but gives them just enough crispiness to satisfy your "french fry" cravings!


Then drizzle about 1tbsp of olive oil and mix until you can't see the flour anymore. Don't use too much oil...they will get mushy.


Season however you please :) I used fresh ground sea salt and black pepper, and a pinch (seriously, a PINCH) of cayenne. Toss.


Now just lay them out in a single layer on baking sheet and bake for 20 minutes in 350 oven, turning fries over half-way through.


*disclaimer.....don't use wax paper!!!! No earthly idea what happened, but the paper smoked like crazy in the oven and the potatoes stuck so badly! Felt like such a moron, and still don't know what I did wrong!*

BUT, they still turned out delicious! So delicious I forgot to take a picture of the final product before we devoured them! lol.

Wow....this is a long post! sorry, ya'll. I've been wanting to share these things and have been waiting for a moment to spare so I'm just cramming it all into one post!

I finally got around to covering a lampshade I've been wanting to makeover for a few months! Here's how it turned out!

BEFORE:

AFTER:

what do you think?! 

Well that's all for now folks!!! I hope you are having a fantastic week :) 

Thursday, February 7, 2013

Peanut Butter and Chocolate Cheesecake

I made this delectable desert yesterday in celebration of my hubby's 25th birthday! There have been a few requests for the recipe and thankfully I remembered to take some pictures along the way, so here it is:


Peanut Butter and Chocolate Cheesecake

Ingredients

2 cups Oreo crumbs
2 tablespoons butter, melted
4x 8 ounce packages cream cheese, room temperature
5 eggs, room temperature
1 cup packed brown sugar
1 cup peanut butter
1/2 cup heavy whipping cream
1 tablespoon vanilla
1 bag mini peanut butter cups
Topping:
1/2 cup peanut butter
6 ounces semi-sweet chocolate chips
3/4 cup heavy whipping cream
10+ mini peanut butter cups (saved from the cheesecake ingredients)

Directions

Make sure your cream cheese and eggs are room temperature.
Preheat oven to 350.

To create your Oreo crumbs, throw them in the food processor like I did, or if you don't have one, just stick them in a zip-lock, squeeze the air out, and roll a glass cup over the bag until there are no big chunks left.


Pour melted butter over crumbs and mix well.


Press into the bottom of a 9" springform pan and bake for 5 minutes. Cool.


Beat cream cheese with a mixer until smooth.


Add eggs, one at a time, beating well between each.....it was at about this point, I was wishing I had a good stand up mixer! ha.


Here is what it will look like with all the eggs mixed in. I got a little nervous at this point because it was sooooo runny..but don't you fret, if your thick cream cheese just turned into soup, your doing just fine.


Add sugar, peanut butter, and whipping cream; mix thoroughly.


Now the vanilla......ok, maybe I took too many pictures.


Now chop up those peanut butter cups as coarsely or fine as your little heart desires, or don't. mmmmm...don't they look delish?!


Now pour half the cheesecake mixture into your cooled crust and layer with the 2 cups of Reese's you just chopped. *keep in mind the chocolate will sink a little, so I would suggest adding more like 3/4 of the mixture if you want your peanut butter cups in the middle of the cheesecake...mine ended up on the bottom.*


Then top with the remaining cheesecake mixture.


Now throw that bad boy in the oven for about an hour. The sides of the cheesecake should be set, but the middle will be a little jiggly, but NOT runny. Mine didn't take quite an hour, others may take 1 1/2 hours, just watch it closely.

*unfortunately, my poor cheesecake cracked BIG TIME!! I've done some research since on how to keep that from happening, but feel free to give me some tips!!*


So if yours cracks like mine did, don't worry.....the chocolate doesn't mind going in the cracks ;)

Cool slightly then put it into the refrigerator for at least 4 hours! (it was actually much better today, so making this the day before you serve it would be ideal.)

Now melt your chocolate chips in a double broiler, or if you don't have that kind of fancy equipment, you can just do it in a...eh em...sauce pan..eek like I did. Remove from heat and add all but 1 tablespoon of the whipping cream. Stir until smooth.

sorry, no pic.

Then pour over the cool cheesecake (while still in the springform pan.) See, now no one will ever even know she was cracked :)


Refrigerate for 30 minutes...I know, I know, you're just dying to get a slice of this stuff! But waiting really does pay off for it to get nice and set.

While you're waiting, place peanut butter and 1 tablespoon of whipping cream in a bowl and microwave until its a runny consistency. It will look something like this...weird pic?


If you have a piping bag, this would be the time to pull it out of the junk drawer, if not just use a spoon or if you wanna be super ghetto like me, you can use one of those handy Walgreen's medicine syringes and fill it up like a bazillion times to create the design you want :)


Now throw whatever you have left of the peanut butter cups on top in whatever fashion you'd prefer....I originally had 10 leftover to use on top, but they kinda dwindled down to 7. somehow. ;)


And there you have it!!!!! I know this was a long tutorial, and I hope I haven't made it sound hard, because it wasn't! Believe me, if I can do it, so can you!

*oh, and make sure you serve this with like a GALLON of milk....seriously, so rich.*

I had some leftover chocolate, so I just melted it, drew some designs on some wax paper, threw it in the freezer for about 10 minutes and topped the birthday boys piece with them :) Fun way to jazz it up.


Happy Birthday to my hard-workin', Jesus-lovin', couldn't-live-without-you, man =)


Friday, January 25, 2013

Big Red

I don't believe I have introduced you to the newest member of our family......


For almost 8 years the hubs drove the same truck! Way to go!

 He was a great truck. He was (almost) always faithful. But it was time for him to leave our family, branch out, and try a new owner. Here he is:


 Not-so-nicely put....he was replaced by bigger, badder, and better :) 


I really am thrilled for Dakota! He deserves it. (And I like driving it too! hehe) It also seats all of us EASILY which is a huge bonus. 


The princess loves Daddy's new truck too :)

Monday, January 21, 2013

Man-Pleasing Pasta!


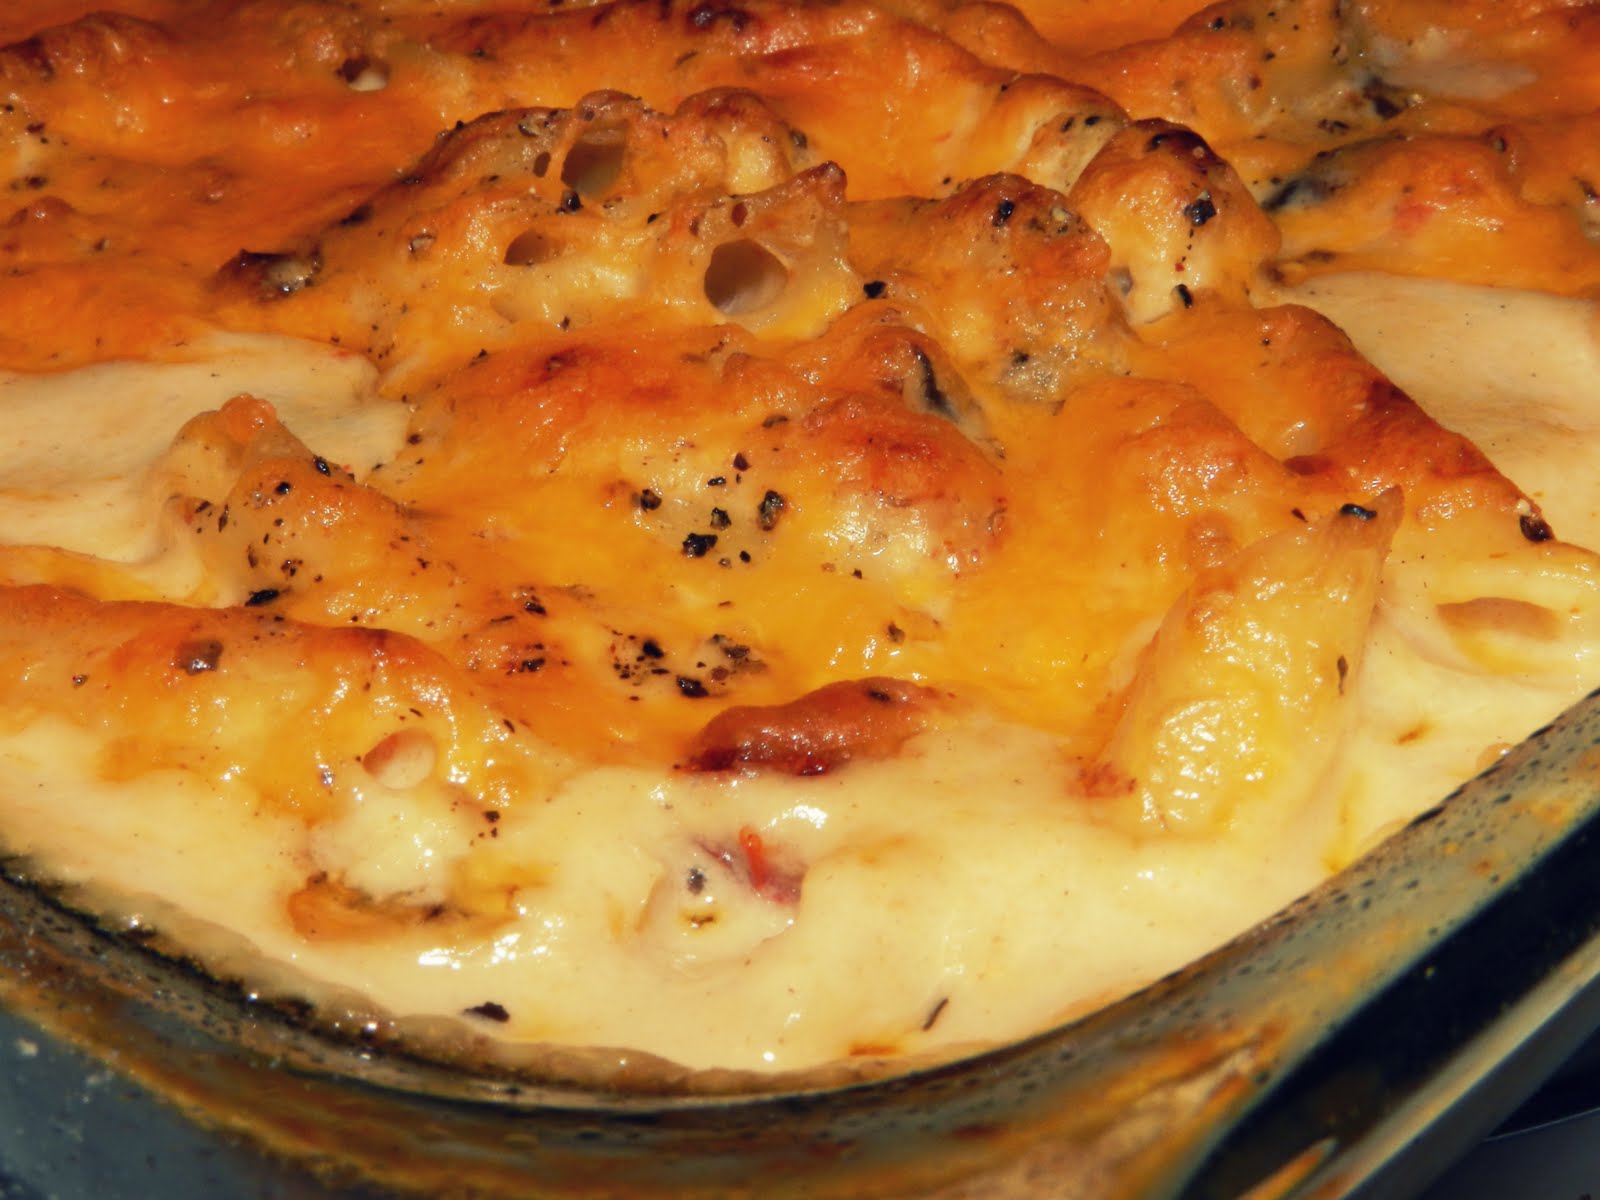
  • I have a great recipe for you all today!! I made this pasta last week and it was just such a hit, I had to share :) Maybe you're thinking, "another pasta recipe?" I know, I know, there are so many out there....but this one really steals the show.

*Be advised, this recipe makes A LOT of pasta!! Its very money conscious as well....two pans of pasta with only 2 chicken breasts! Recipe makes two pans....one for immediate cooking, the other for freezing.*


Baked Penne with Chicken and Sun-dried Tomatoes

  • Ingredients

  • 6 tablespoons butter, plus more for baking dishes
  • Coarse salt and ground pepper
  • 1 pound penne rigate
  • 1 teaspoon olive oil
  • 2 boneless, skinless chicken breast halves (8 ounces each), halved horizontally
  • 1/2 cup plus 2 tablespoons all-purpose flour
  • 4 garlic cloves, minced
  • 6 cups 2% milk
  • 10 ounces white mushrooms, trimmed and thinly sliced
  • 1/2 cup oil-packed sun-dried tomatoes, drained and thinly sliced
  • 1 1/2 cups shredded jack cheese
  • 1/2 cup finely grated Parmesan 


Directions
  1. Preheat oven to 400. Butter two shallow 2-quart baking dishes. In a large pot of boiling salted water, cook pasta; drain, and return to pot.
  2. In a large nonstick skillet, heat oil over medium-high heat. Season chicken with salt and pepper; cook until just done throughout, 3 to 5 minutes per side. Halve each piece lengthwise, then thinly slice crosswise.
  3. In a 5-quart heavy pot, melt butter over medium heat. Add flour and garlic; cook, whisking, 1 minute. While whisking, gradually add milk; bring to a simmer, whisking frequently. Add mushrooms and tomatoes; cook 1 minute. Take off heat, gradually stir in jack cheese and 1/4 cup Parmesan.
  4. Add chicken and pasta to pot; season with salt and pepper. Divide pasta mixture between baking dishes; sprinkle each with remaining Parmesan.
  5. Bake, uncovered, until top is golden and bubbling, about 25 minutes. Let stand 5 minutes before serving.

    Instructions for Freezing
To Freeze: Prepare through step 4; let cool. Cover tightly with foil, and freeze, up to 3 months.

To Bake From Frozen: Preheat oven to 400, and bake (still covered in foil) on a rimmed baking sheet until center is hot, about 1 1/2 hours. Remove foil; bake until golden, about 15 minutes more.

I hope you will try this! Your husband, children, and dinner guests will be pleased ;)

Thursday, January 10, 2013

summing up the holidays

Instead of boring you with lots of words about how awesome our holidays were, which they were, and how much we enjoyed spoiling our chrildren for christmas, which we did, I would much rather share our moments in pictures :)

There was cookie making


Present wrapping


We had the kids open a present on Christmas Eve that contained new jammies, hot chocolate and marshmellows, and a new Christmas book!


Cookies were left for Santa


The hubs and me stayed up late filling the stockings, putting bikes together, and building this...


There were lots of smiles Christmas morning!!! Ryder got a Polaris


ClaireBell got a tricycle


I got a brand new iPhone5..what?! not pictured here, but believe me, I'm LOVING it!


Dakota got a PS3! woop woop! but Candyland was played this day instead ;)


And this is what the family room looked like after the morning explosion


Wish I had time to go into more detail!! We spent the weekend before Christmas at my parents house, Christmas Eve and Christmas morning we spent together as a foursome, and then later that afternoon went to the in-laws for Christmas dinner!
 
Happy New Year to you all!! Its gonna be a good one.


2013, here I come!!

Wow...how do you catch up after months of not blogging?? Why do I feel the need to catch up? Can I just start over...pretend like this is my first post and share the news from here on out?? But what about all those sweet Thanksgiving, Christmas, New Years and everything in between pictures I just knew I would share with you? ugh.

Well, let me start with this.....today is my little sisters birthday :)  22 Woop Woop! She is marrying her best friend this summer and graduating from college the month before! Exciting stuff, right?! We have had such fun planning wedding stuff, trying on dresses....lots and lots of dresses! pinning "must-have's" on Pinterest, and flipping through catalogs.I am so excited to see each little decision made and let me tell you, its coming together just beautiful :)


Happy birthday, Christina! I hope this year is amazing!

I am looking forward to this year! Lots of things on my "to-do" list, resolutions made, friendships I am hoping to strengthen and a family I can't wait to know, love, and serve better.

Look for a post tonight or tomorrow with lots of pics and a glance back on 2012!! Thank you for reading and sticking with me and my inconsistant blogging! haha. until later....

Happy Thursday, friends.


Wednesday, November 28, 2012

oh, how I've missed you

hello blog land. hello to my whopping 14 followers! lol. really do appreciate you guys :) I don't know why when things get busy, I tend to leave this little tiny piece of my life behind and determine that I'll catch up eventually. When in reality, this blank white space is such an escape for me. So here I am. Hopefully back for good...for a while...maybe.

what a whirlwind these past few months have been! and unfortunately, my Picasa account is completely out of space (free space, that is) so I'm in the process of transferring files and such....so no pictures today :( Really hoping to get things up and running soon because I have some great Christmas tutorials for you! Me and the littles have been busy this week getting ornaments made, collecting pine cones, putting up lights and getting ready to make Christmas-Sunday-wear!

I hope you all had a great Thanksgiving! Look for those tutorials soon :)